
How to Choose the Right Implant Wrench in 2026?

Choosing the right Implant Wrench in 2026 is not a brand-only decision. It is a fit, torque, and workflow decision. A wrench that looks suitable may still mismatch the implant system or driver interface. Check the manufacturer’s instructions, connection type, torque range, calibration status, and cleaning requirements before use. The markings should be easy to read under operatory lighting, and the handle should feel controlled—not slippery—in a gloved hand.

Dr. Carl E. Misch, a widely recognized implant dentistry educator, emphasized prosthetically driven planning in his clinical teaching. A practical takeaway for wrench selection is: “Choose the tool that delivers the specified torque for the system in use.” This wording is a summary, not a verbatim quotation. That distinction matters. Exact recommendations vary by implant system, and a wrench should never replace the manufacturer’s protocol.

This guide compares manual, ratcheting, and torque-indicating options, with attention to compatibility, ergonomics, maintenance, and traceable calibration. Picture a compact cassette, legible scale, and secure connection at the chairside. Small details can prevent delays. They do not guarantee outcomes. One point deserves a second look: clinicians sometimes favor familiar tools even when protocols change. In 2026, verify the current instructions before choosing—or reusing—an Implant Wrench.
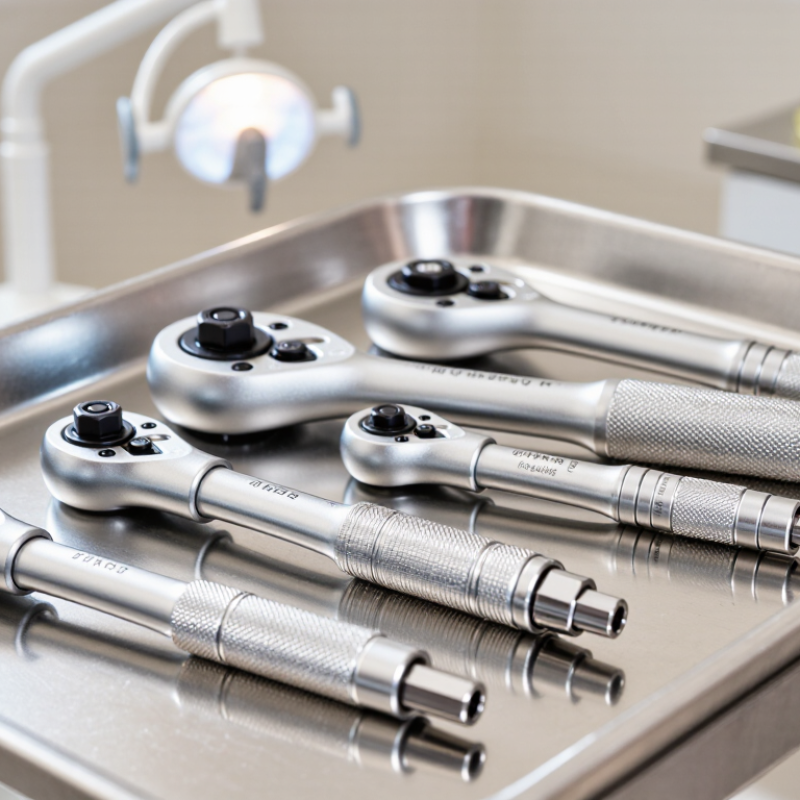
How to Choose the Right Implant Wrench in 2026?

What an Implant Wrench Is and How It Functions

An implant wrench is a hand instrument used to turn compatible implant components, such as a prosthetic screw or abutment. Its working end fits the component’s driver slot or shape. The handle gives the user control; a torque wrench may also indicate or limit applied force. Small details matter. A worn or mismatched tip can slip, damage the connection, or make the reading unreliable.

During use, the tip is seated fully before the handle is turned. With a calibrated torque wrench, force is applied according to the component’s instructions, rather than guessed by feel. Clicks or other signals can indicate that a preset torque has been reached, depending on the instrument design. Not every wrench measures torque. Some are intended only for controlled manual turning. That distinction is easy to overlook.

A clean, intact instrument helps support consistent handling. Check that the driver engages securely and that the wrench moves smoothly; resistance or looseness deserves attention. Calibration and cleaning requirements vary, so follow the instrument and implant-system instructions. In practice, a tool can feel familiar yet still be unsuitable for a different connection. That is worth questioning. The right wrench is not simply the one that fits loosely over the part; it must engage correctly and be used within its intended range.

Which Implant Systems and Connections It Must Fit

Choosing an implant wrench begins with the connection, not the handle. Internal hex, external hex, and conical connections require different engagement geometries; a wrench that appears to fit may still contact the screw poorly. Check the implant system’s instructions for use and confirm the platform, screw-head shape, driver size, and required torque. Small differences matter. A loose fit can round the screw recess, while a mismatched wrench may give a false sense of control.

Market growth makes compatibility especially important. Grand View Research estimated the global dental implants market at USD 4.6 billion in 2023, with projected growth of 9.8% annually from 2024 to 2030. That figure describes market value, not connection standards, so it cannot identify a suitable wrench. Use the manufacturer’s compatibility chart, then verify the instrument against the actual screw and connection before clinical use. Check whether the wrench is manual or torque-limiting, and confirm its calibration and cleaning instructions. Look closely.

A detail that is easy to miss: some systems use different drivers for placement and prosthetic screws. Do not assume one tool fits both. If the connection type or screw generation is uncertain, pause and check the implant record or technical documentation. Guessing is not a fitting method.

How Torque Requirements Determine the Right Wrench

How to Choose the Right Implant Wrench in 2026?
How Torque Requirements Determine the Right Wrench

Torque is not a guess or a measure of hand strength. It is a specified value for tightening a particular implant connection. Check the current instructions for the exact implant component before selecting a wrench. Different connections may require different torque settings, even within one treatment plan. The correct value matters.

Match the wrench’s torque range to the required setting. A wrench that cannot reach the specified value is unsuitable; one used near the edge of its range may be harder to control. Look for clear scale markings and a design that fits the working space. A narrow access angle can make a bulky handle awkward. Small details count.

Calibration matters, too. Follow the manufacturer’s instructions for checking, cleaning, and maintaining the instrument, and do not rely on a click alone if the wrench is overdue for inspection. Keep the setting visible while working. Stop if the wrench slips, feels damaged, or behaves differently than expected. That pause can prevent a rushed decision. It is tempting to think one wrench will cover every case, but that assumption deserves a second look. Select the tool for the specified torque and connection, then verify its condition before use.

Which Wrench Type Suits the Clinical Workflow

How to Choose the Right Implant Wrench in 2026?
Which Wrench Type Suits the Clinical Workflow

The right implant wrench should fit the procedure, not just the tray. A manual torque wrench gives tactile feedback and needs no power source. It can suit routine placement when the clinician wants direct control. A ratchet-style model helps in restricted spaces, where a full hand turn is difficult. For frequent torque-controlled work, a calibrated device with a clear scale can make settings easier to check. Small details matter: Can gloved fingers read the markings? Does the head fit around the patient’s cheek? Is the instrument easy to clean and reassemble?

Torque accuracy deserves careful attention. ISO 6789-1:2017 sets accuracy requirements for hand torque tools, including a ±6% limit for certain tool classes. That is a useful benchmark, not proof that every implant wrench meets it. Check the instrument’s instructions and service schedule, and confirm its torque range matches the implant system’s stated requirements. A 2023 systematic review in Clinical Oral Implants Research also found that preload can vary with tightening method and repeated use; wrench choice alone cannot guarantee a consistent result. Keep a simple calibration log. It may feel like extra paperwork. Yet a worn spring or unclear scale can quietly undermine an otherwise smooth workflow.

Choosing an Implant Wrench for the Clinical Workflow

Qualitative workflow-fit ratings (1 = limited, 5 = strong), not measured clinical outcomes. Actual torque limits and compatibility depend on the implant system and the wrench’s instructions for use. Verify both before clinical use.

How to Verify Accuracy, Sterilization, and Maintenance Needs

How to Choose the Right Implant Wrench in 2026?
How to Verify Accuracy, Sterilization, and Maintenance Needs

A wrench can feel precise and still deliver the wrong torque. Check its stated range, units, and compatibility with the implant system. Then compare its output with the manufacturer’s specified torque using a calibrated torque tester. Record the result and date. A repeatable click is useful, but it is not proof of accuracy. If readings drift, remove the wrench from clinical use and arrange inspection or calibration. The awkward truth: busy clinics may postpone this check.

Sterilization instructions matter just as much. The CDC’s Guidelines for Infection Control in Dental Health-Care Settings classify instruments that penetrate soft tissue or bone as critical items; they should be heat sterilized. Confirm that the wrench’s materials and design tolerate the stated cleaning and sterilization cycle. Hinges, markings, and narrow crevices deserve a close look after cleaning. The CDC also stresses following device manufacturers’ instructions for processing reusable instruments. Do not assume every wrench has the same limits. Keep a simple log of cycle exposure, inspection, and maintenance, and replace a tool with corrosion, damaged markings, or inconsistent readings. Small details count.

How to Choose the Right Implant Wrench in 2026? — How to Verify Accuracy, Sterilization, and Maintenance Needs

Selection Dimension What to Verify Practical Check Decision Guidance Record to Keep
Implant system compatibility Connection type, driver interface, and approved use with the intended implant components. Compare the wrench and driver specifications with the component instructions for use (IFU); confirm engagement without wobble or slipping. Choose only a wrench explicitly compatible with the implant system and the intended clinical procedure. Compatibility reference, IFU version, and instrument identification.
Torque range and units Specified operating range and whether readings are expressed in N·cm or another unit. Check markings and documentation; ensure the target torque is within the instrument’s stated range. Do not use a wrench outside its specified range. Follow the implant manufacturer’s instructions for the required torque. Specified range, unit, and applicable procedure reference.
Torque accuracy Manufacturer-stated accuracy or tolerance, calibration requirements, and verification method. Use a suitable, in-date torque tester according to the wrench IFU. Test at the points and frequency specified by the manufacturer. Accept results only against the stated tolerance and testing procedure; remove from service if results fall outside limits. Test date, tester identification, measured values, acceptance limits, and operator.
Repeatability and operation Consistent torque delivery, clear release or indication, and smooth movement. Operate the wrench as directed and check for sticking, abnormal noise, delayed release, or inconsistent readings. Do not rely on an instrument that behaves inconsistently, even if its exterior appears undamaged. Functional-check results and any reported irregularities.
Sterilization compatibility Validated cleaning and sterilization method, temperature limits, disassembly instructions, and cycle restrictions. Review the device-specific IFU and the sterilizer instructions; confirm that the intended cycle is validated for the instrument. Follow the specified reprocessing instructions. Do not assume all wrenches tolerate the same cycle or parameters. Reprocessing procedure, cycle record, and any required load documentation.
Cleaning access Whether the instrument must be disassembled and whether joints, openings, or detachable parts can be cleaned effectively. Inspect all accessible surfaces after cleaning; follow the stated disassembly and inspection steps. Choose a design that staff can reprocess consistently using the clinic’s validated workflow. Cleaning checklist and inspection findings.
Materials and corrosion resistance Material-care instructions and restrictions on detergents, chemicals, or processing conditions. Inspect for corrosion, pitting, discoloration, cracks, or damaged markings after reprocessing. Remove damaged or corroded instruments from service and follow the manufacturer’s assessment or replacement guidance. Inspection results, damage reports, and service actions.
Maintenance and calibration interval Manufacturer-recommended inspection, lubrication, servicing, and calibration intervals. Compare usage and reprocessing history with the specified schedule; arrange verification by an appropriate service provider when required. Use the device-specific schedule rather than applying a generic interval to every wrench. Usage log, service history, calibration or verification dates, and next due date.
Identification and traceability Readable model or instrument identification, serial or lot details where provided, and status labeling. Confirm the instrument can be distinguished from similar tools and linked to its maintenance and verification records. Do not use an instrument whose identity or service status cannot be confirmed. Inventory entry, identification details, and current status.
Final selection Compatibility, accuracy verification, reprocessing requirements, usability, and available service support. Review the IFU, test documentation, sterilization workflow, and maintenance plan before purchase or clinical use. Select the wrench that meets the clinical requirements and can be accurately verified, safely reprocessed, and maintained. Selection rationale, approved workflow, and responsible reviewer.

Always follow the current, device-specific instructions for use and applicable local reprocessing requirements. Torque-testing procedures and acceptance limits vary by instrument.

chevron-down